|
Stairway to Heaven
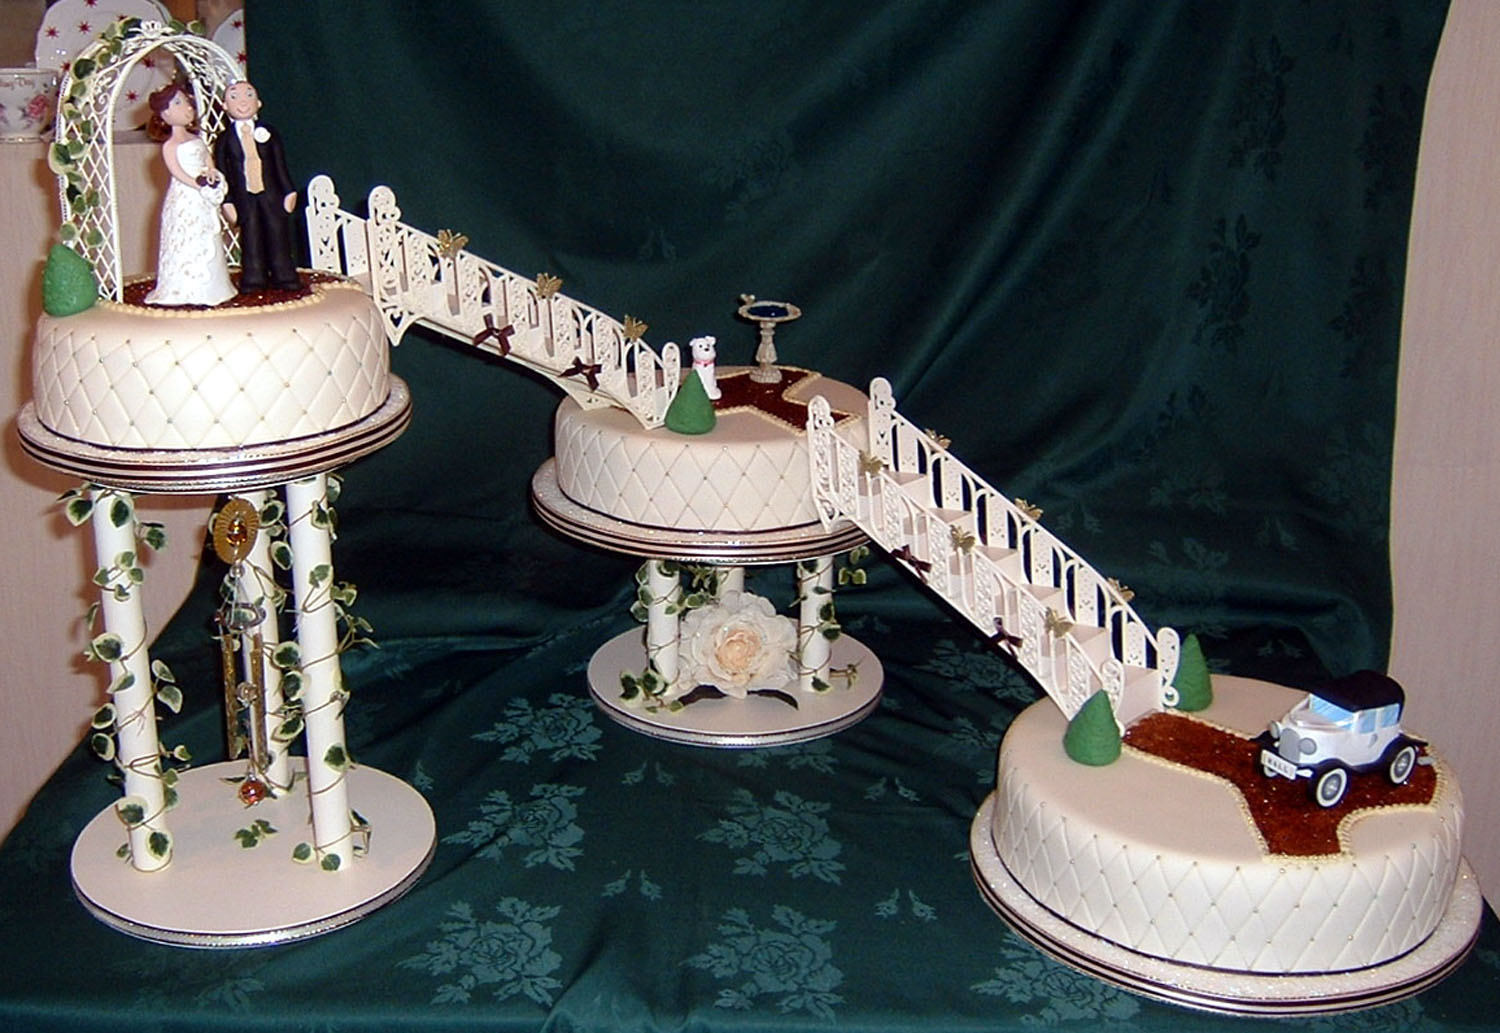
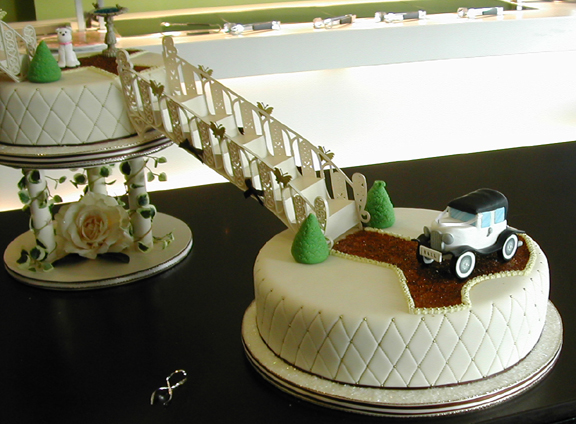
This cake I have just recently made for my daughters wedding. I will go through it in stages, starting with the bottom layer below. It is a 12" round, can be done with any shape but on a square please remember to plan the joints to the corners. It is covered with champagne sugar paste and the sides are created by using a stitched trellis tool. Mark out a centre line with a dot to start, mark again along 1". Then the same at the bottom do this twice so you have 3 marks an inch apart at top and bottom. Join the first top mark with the third bottom mark, i.e. the line from top to bottom is 2" apart. Continue right round the cake ensuring to finish evenly. Then work exactly the same in the opposite direction, creating the stitched quilted diamond. Next using edible glue and this can be fiddly so use tweezers. Place a very small gold dragee at each crossover point. Push them in slightly to avoid any falling off. Round the bottom of the cake is a very fine chocolate ribbon. The board was iced previously and has an overlay of clear, aurora-borealis sparkles, creating a magical vision of colours. The board is trimmed with ivory & gold ribbon over-laid with chocolate ribbon and then finally plain ivory again. Layering of ribbon gives it added depth. Back to the top, the trees are made for green coloured sugar paste rolled into a fir shape then using edible glue and a candy stick position them at each side of the stairs, use a star piping nozzle to create the pattern on the trees. The gravel is 2 colours of sparkles (gold & chocolate) ground to a fine shimmer using a pestle & mortar. Paint out your path using edible glue then carefully sprinkle, to desired thickness. (Remember not to blow on it or you will be picking it out from the board for days, lol.) Using champagne royal icing, pipe around the edge of the path and top again with a gold dragee. Place the wedding car in position.
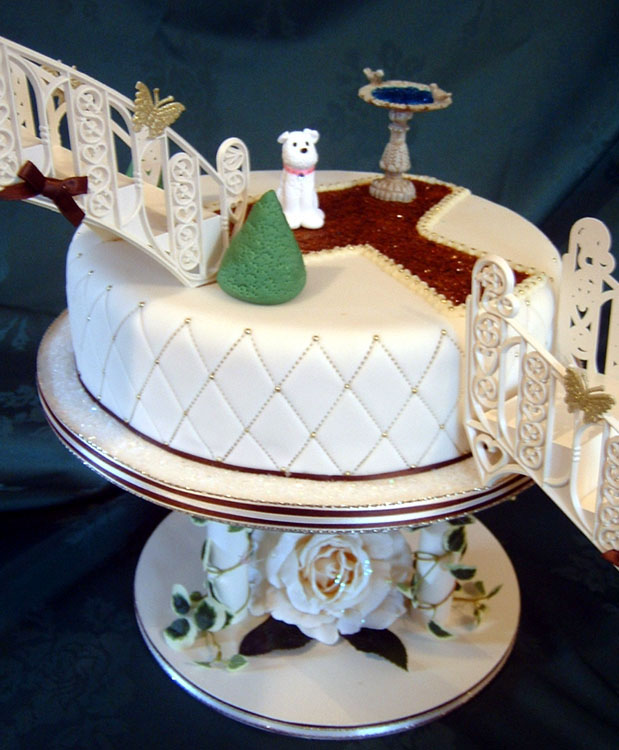
The middle tier is done exactly the same as the bottom, except I have added a birdbath and to create the glistening water. I added a couple of drops of water to some sugar and melted it down in the microwave (please be careful as the sugar become very hot quickly). Then add a generous amount of blue sparkles and leave it to set. On the top of this one is the bride & grooms dog Bella. A white Bichon-frise. I have added her pink collar using thin ribbon, dog tag using a square crystal tipped on end to create a diamond shape. Finished with tiny crystal rhinestones round her collar.
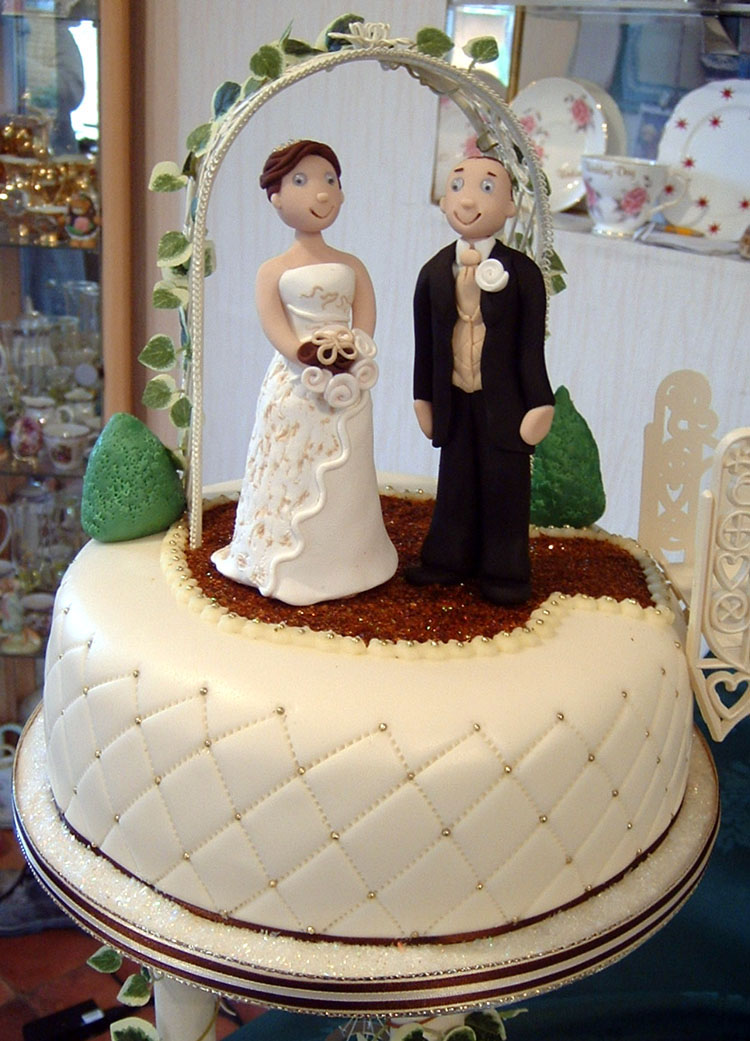
The staircases are placed into position, using the spikes to secure in the bottom of each stair. Again the top tier is done exactly the same but I have added the bride & groom. They are wearing the exact outfits that they wore on the day. You can achieve this by looking on the internet for personal wedding cake toppers. You simply purchase, send off as many photos as possible to the creator and they will do the rest. The lady we purchased from had Maria's dress down to a tee including her buttons down the rear of her address. It is topped with a trellis arch, which I decorated with ivy and again added a couple of fir trees. The cake stands my hubby made for me which again I painted and decorated. The middle tier with ivy and the same rose as in the bride's bouquet and the large cake stand was decorated with ivy but had a gold wind chime that tinkled in the breeze underneath. Both finished off with the gold, ivory and chocolate ribbon.
|